Building a Wood-Fired Micro Oven
Interested in building this oven? Purchase plans here!
Difficulty: Amateur to master craftsmen
Time: 3-4 hours (from purchase to build)
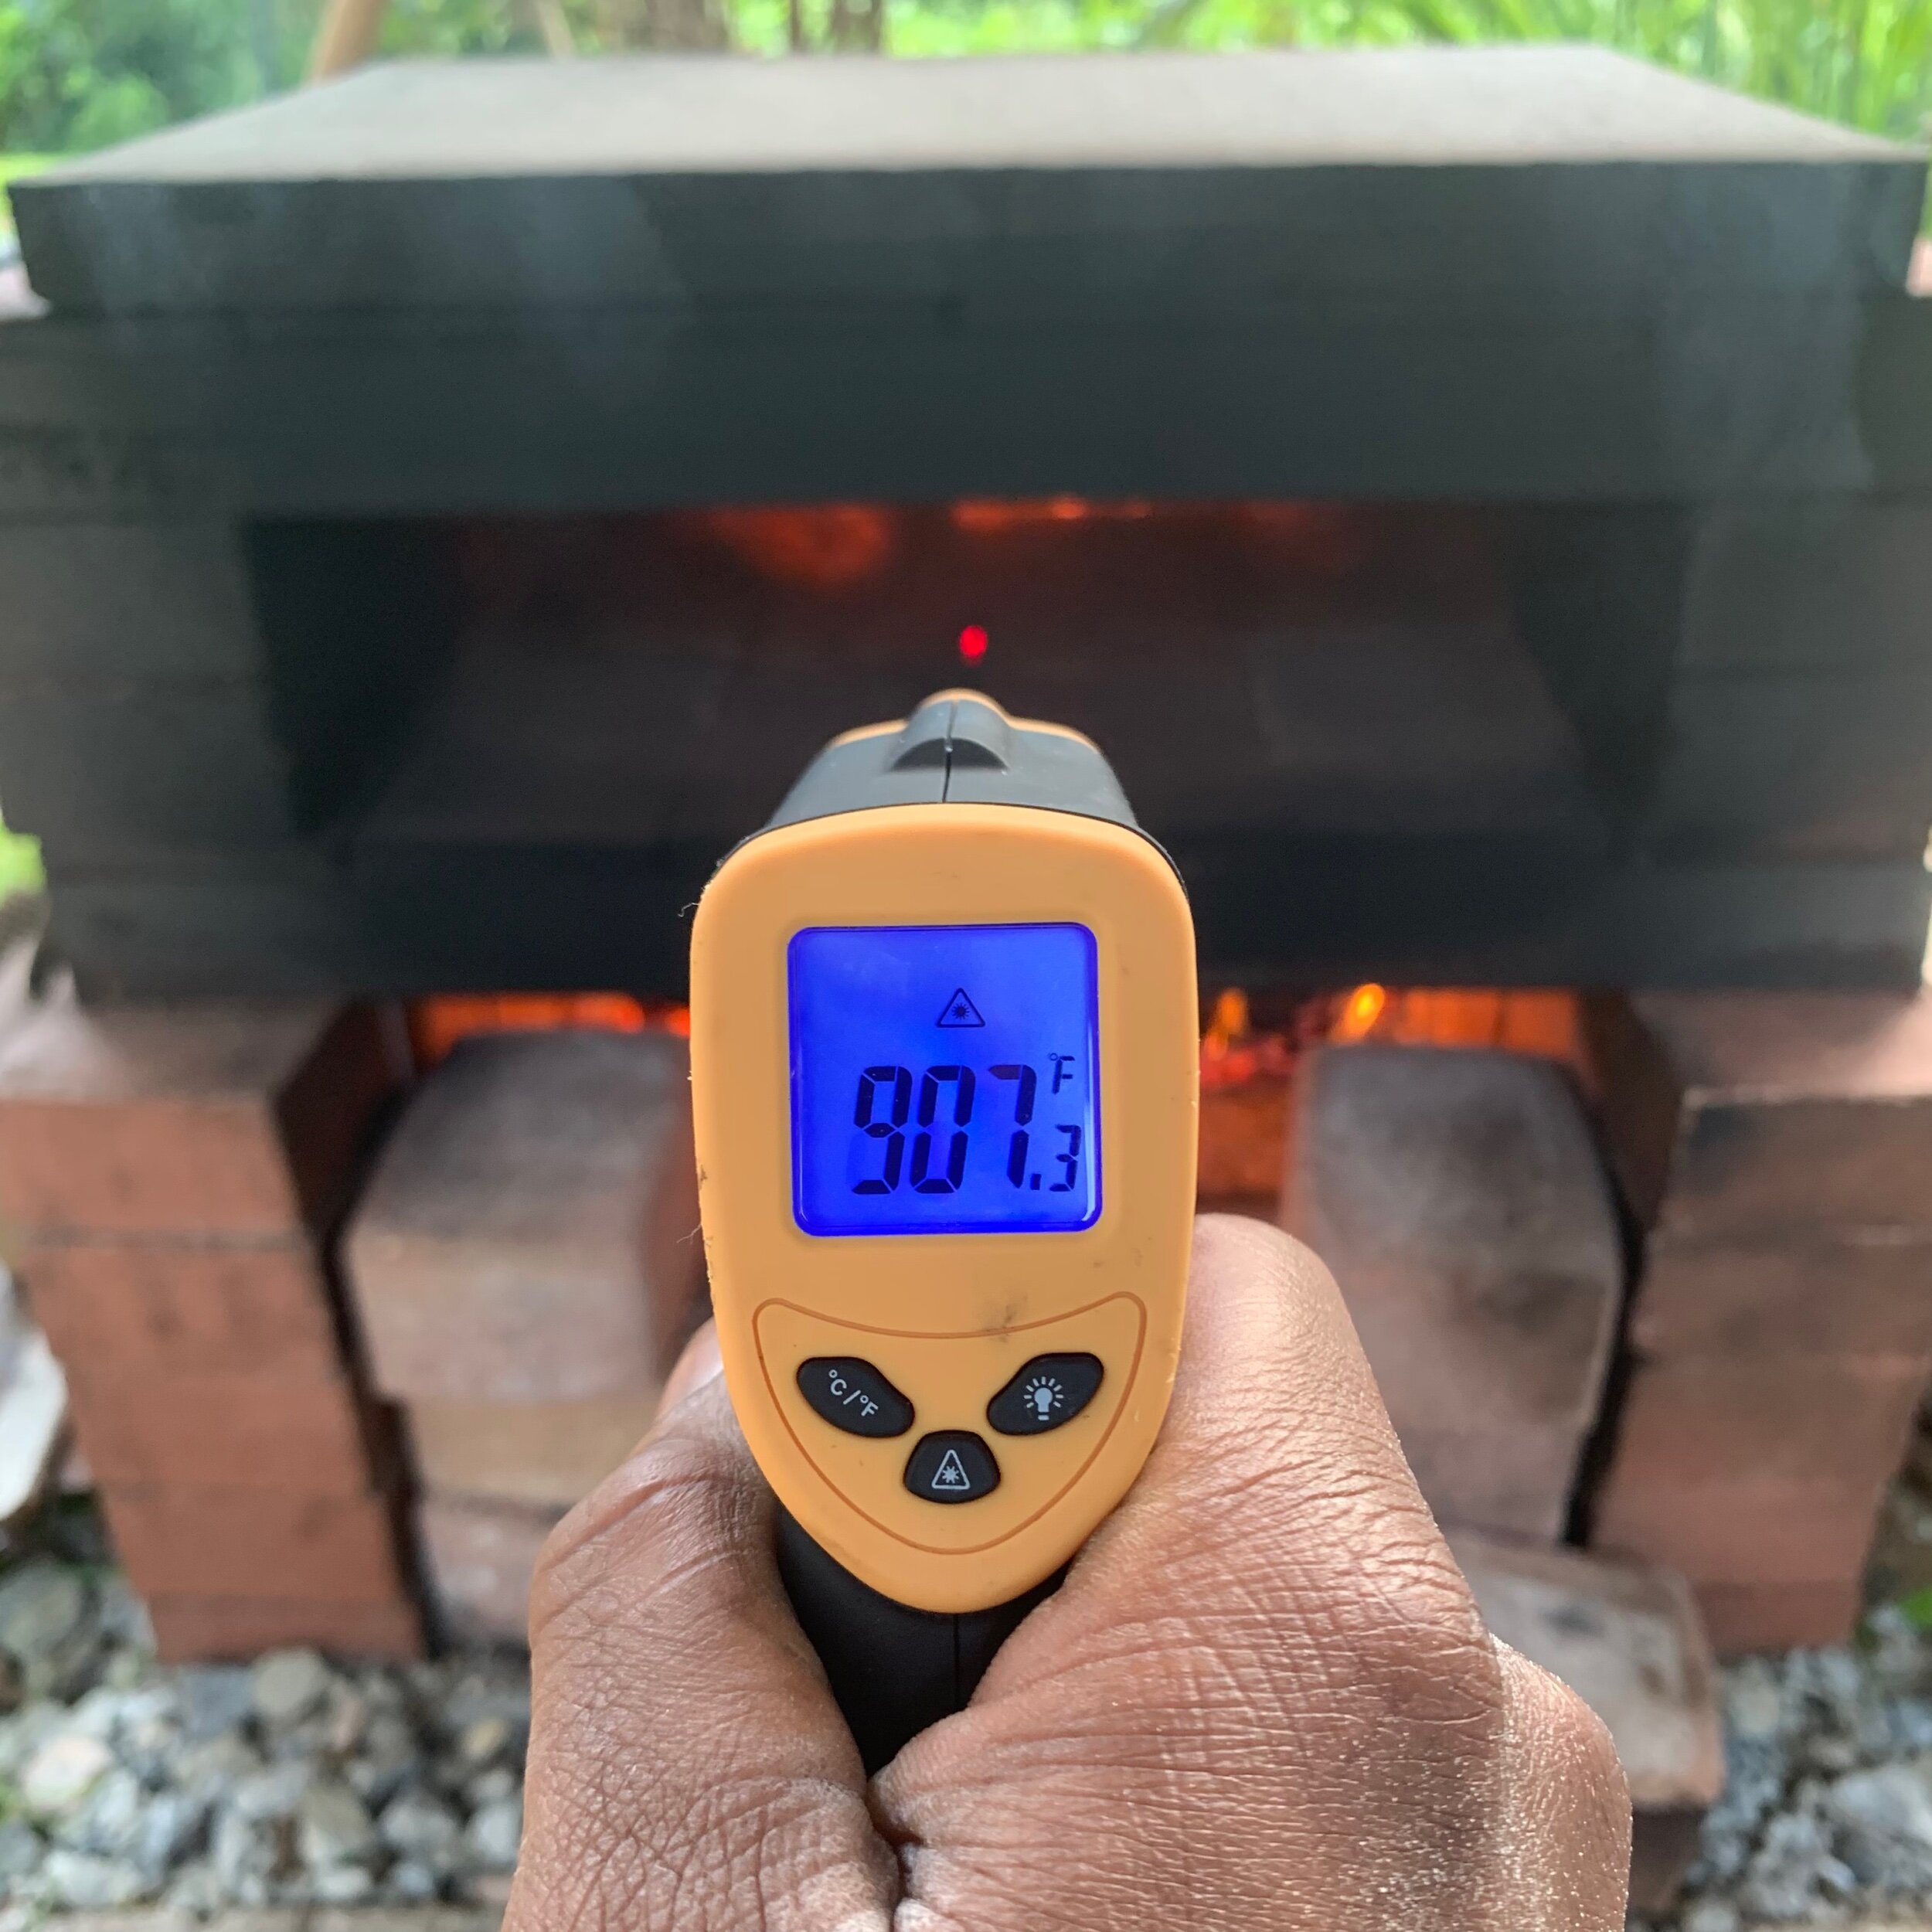
Temperature: Over 900 degrees F
Material Cost: $200-$250
———
Introduction
After getting more and more into pizza making, it quickly became clear that the original and ideal method of baking in a high-temperature oven would be necessary to achieve the type of pizza I’ve been seeking.
What’s more, having a wood fueled oven like this that can cook or bake almost anything quickly, effectively, and deliciously will come in handy when the power goes out or fuel becomes scarce. Better to stay ready so you don’t have to get ready… Just saying.
As you might imagine, a proper full-sized brick oven can range anywhere from a few thousand dollars to many tens of thousands of dollars. What if there was a way to achieve similar results at a fraction of the cost?
TLDR: Yes, it turns out it is possible reach the temperatures needed to bake incredible pizza and more in minutes, and it won’t break the bank.
After scouring YouTube for brick oven videos, I came across this video from Chefsteps going step by step (as their name implies) how to build a simple brick oven with nothing but sand, gravel, and forty-seven 8”x4”x2” regular clay bricks and two large 16”x24”concrete pavers for the deck and roof.
Promoted as being an effective but very low cost solution to pricey brick ovens, I figured I’d give it a shot. In the video, Grant says you can find the materials in any hardware store like Home Depot or Lowes (if you live in the US). After striking out at two Home Depots and not finding the proper simple bricks or pavers, I decided to cut to the chase and head to my local masonry supplier.
I was able to find find the bricks I needed, but they didn’t exactly have the concrete pavers and instead recommended temperature treated flagstone. I was a bit suspicious that the flagstone would work… more on that later.
I came home, hauled the 50 or so bricks and two flagstone pavers out of my Camry trunk, and began the ever important process of creating a level foundation with sand and gravel. Once I did that, it wasn’t long to build up the oven and stack the deck and roof.
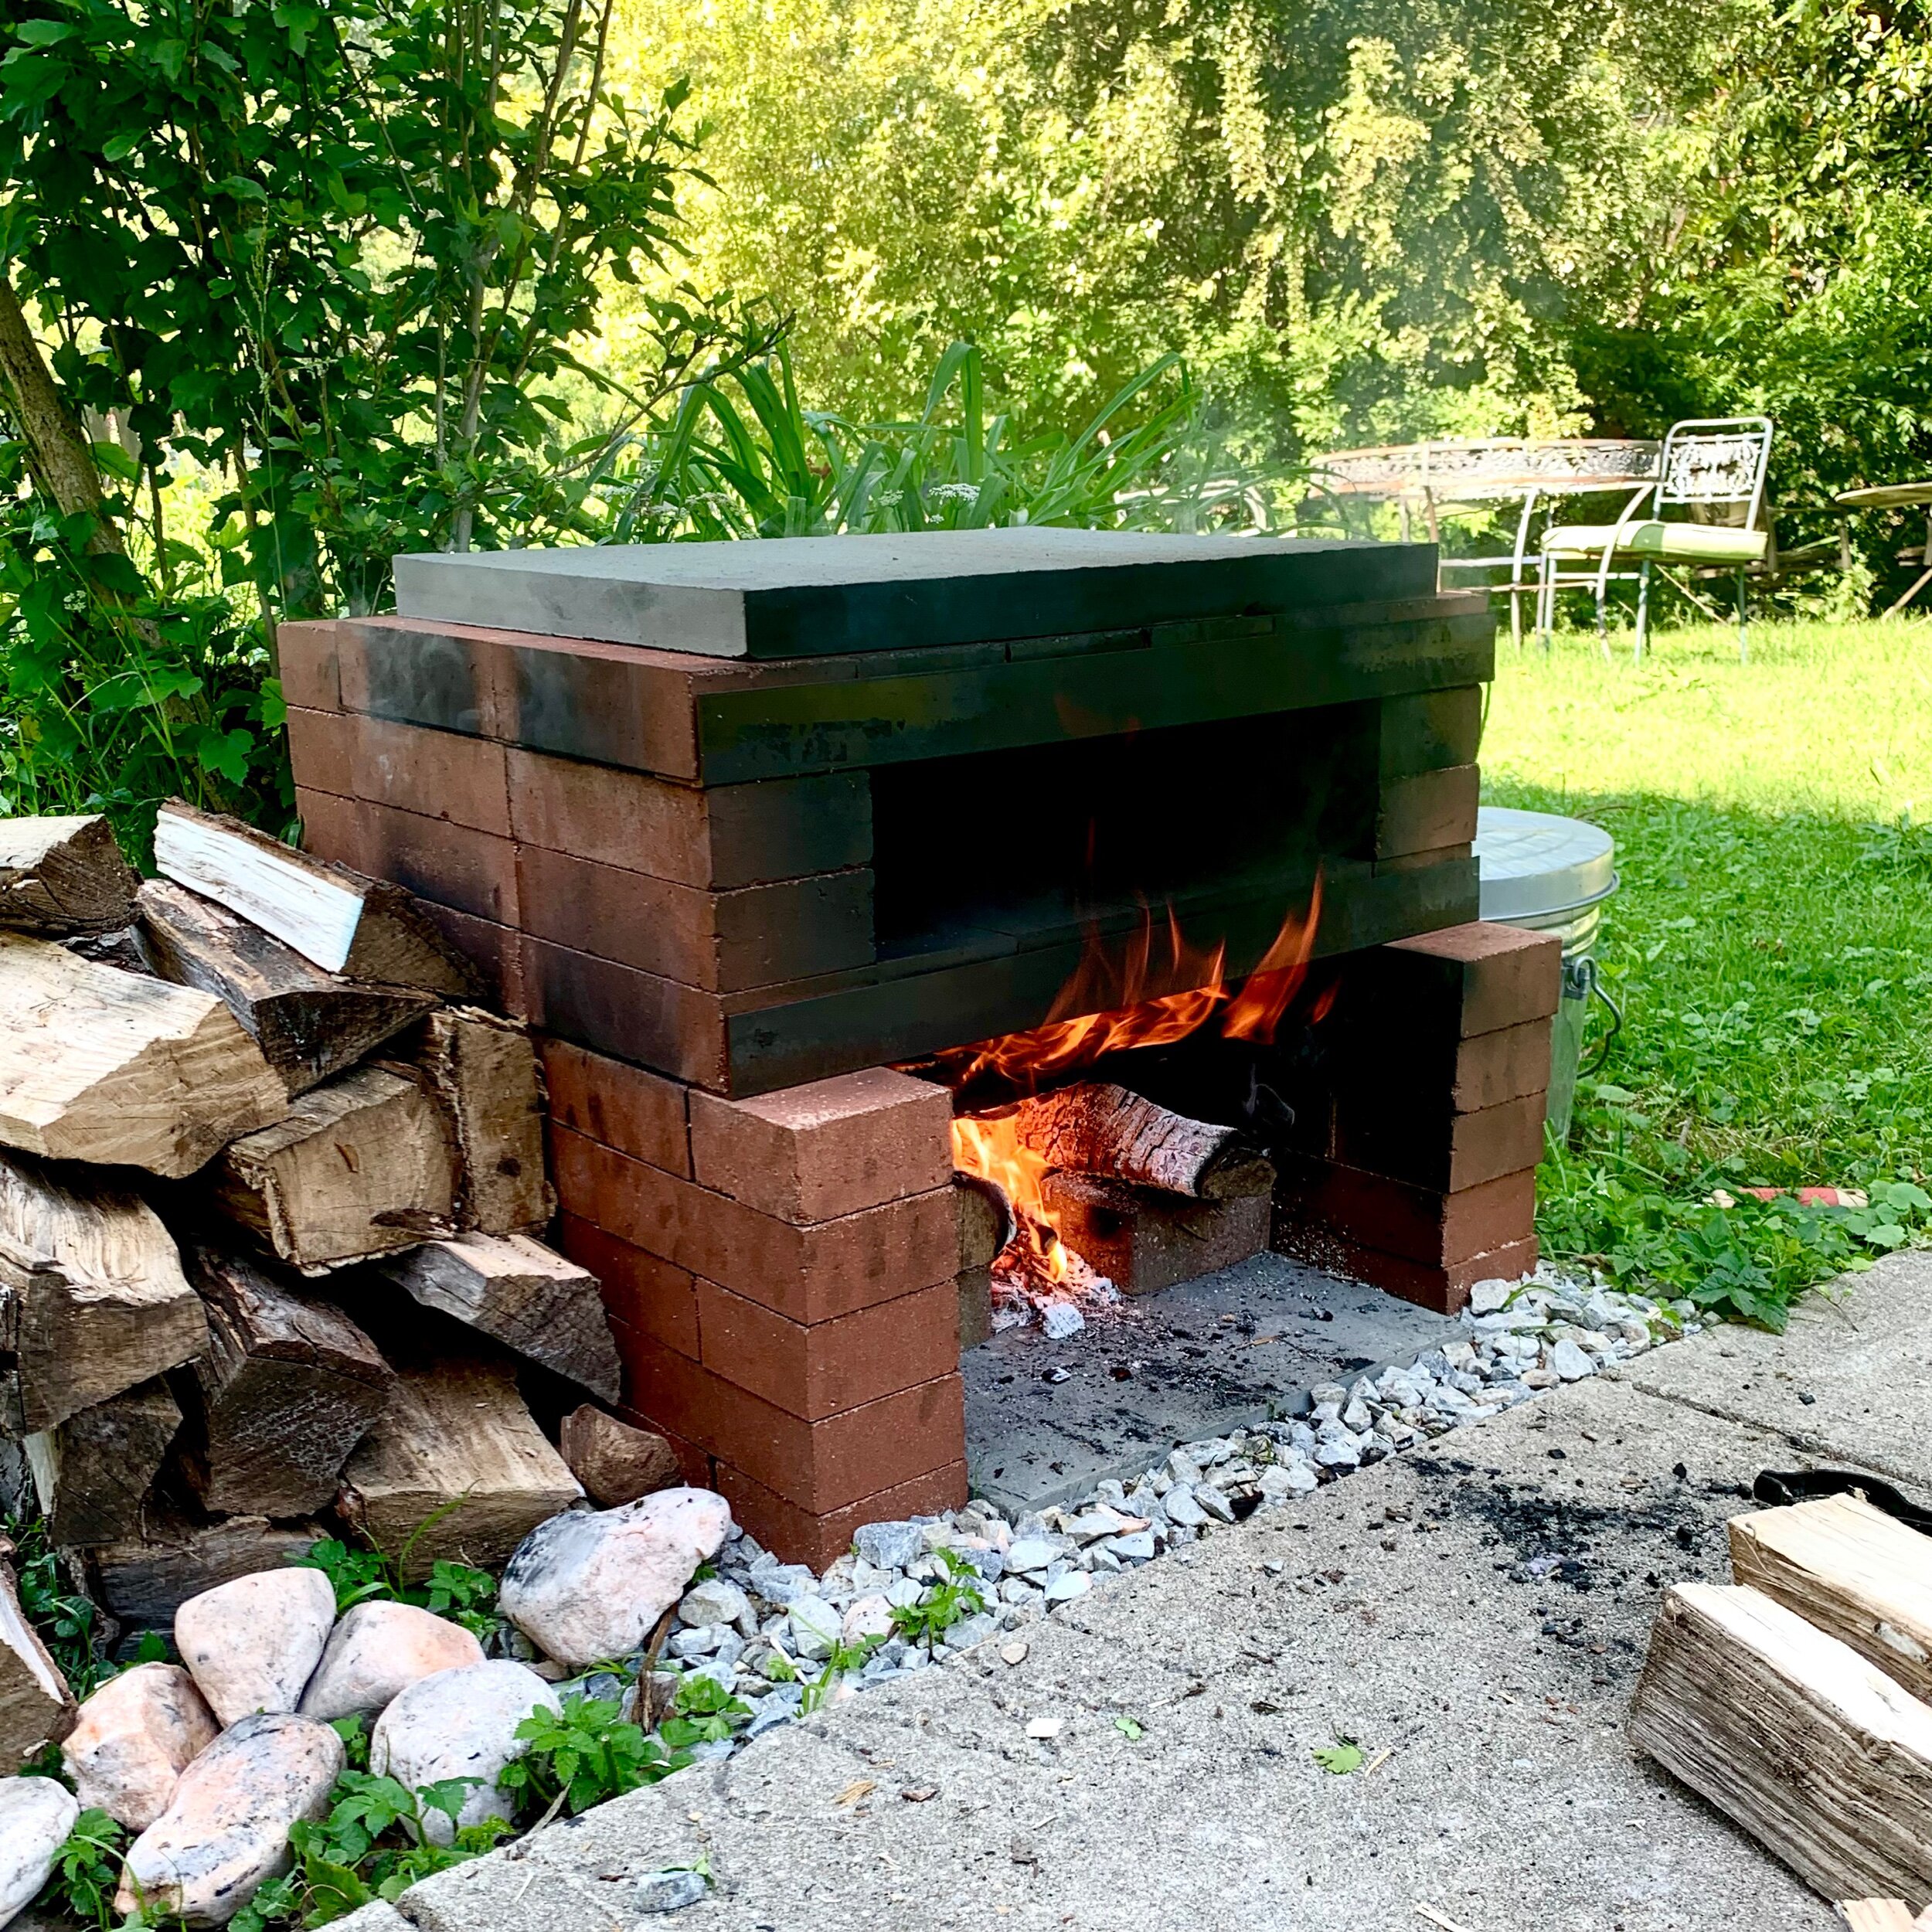
Thrilled, I had what looked like a functional oven and was ready to light the first fire!
First build complete, using inferior materials. As you’ll learn, when you go cheap, you weep!
Failed Fire
Once the fire started and the oven began to heat up things seemed alright. That is, until I heard the first crack from the flagstone getting too hot. “The sales guy said this would be better,” I thought to myself. But deep down, I had a feeling the flagstone just wouldn’t be able to take the heat. This guy knows exactly what I went through… If only I saw his video before purchasing the stones.
Unlike him, I wasted no time putting that fire out so as not to have exploding shards of fiery-hot flagstone blasting from my back yard.
Instead, I rethought the whole concept.
An Improved Design
That failed experiment showed me that there had to be a better way of building the oven. I did more research, watched more videos, and concluded three things:
Though a good bit more expensive, using safer materials like lead-free firebrick (brick rated at over 2500 degrees F) would be a much better option than a low-cost solution like the one proposed in the original Chefsteps video. The materials would also last longer and retain heat better since they are designed for the task of getting really hot.
To use 100% firebrick construction for the deck and roof, I would have to create some type of sturdy support made from iron or steel to hold the bricks.
Most who have good ideas and oven designs aren’t doing the oven justice by making the best pizza possible (no offense). If only they were using my dough recipe!
Taking yet another trip to the masonry supplier, I loaded up on 70 firebricks (as opposed to the 47 needed for the original oven design). Price difference at the time was $1.75/firebrick vs. $0.92/regular brick. Total cost for bricks was about $125.
They didn’t quite have the flat steel or iron that I needed, so I went to Home Depot and grabbed 4x pieces of angle steel for the front and back of the deck and roof, and 2x pieces of flat steel for the middle of the deck and roof. They were both a bit longer than I needed, so I used a handy and helpful neighbor’s belt saw to cut them to my desired length of 28”. Steel is not cheap, and the 6x pieces cost about $75.
Once I disassembled the first disaster and put those bricks aside, I decided to use the leftover flagstone for the base layer of the oven to have a nice flat ground surface to start the fire on. If you notice in the Chefsteps video, they start the fire directly on top of gravel. How on earth would you be able to effectively clean all the ash from the oven? A vacuum cleaner?
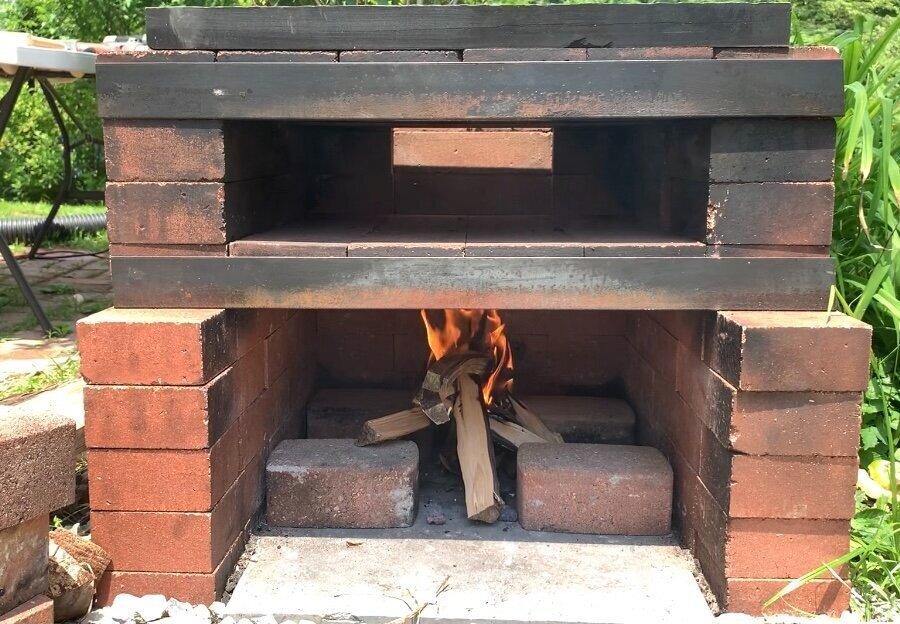
To make controlling the fire easier, I made the bottom level five courses high as opposed to the four in the original plans. Other than that, the oven deck and back ventilation system remained the same.
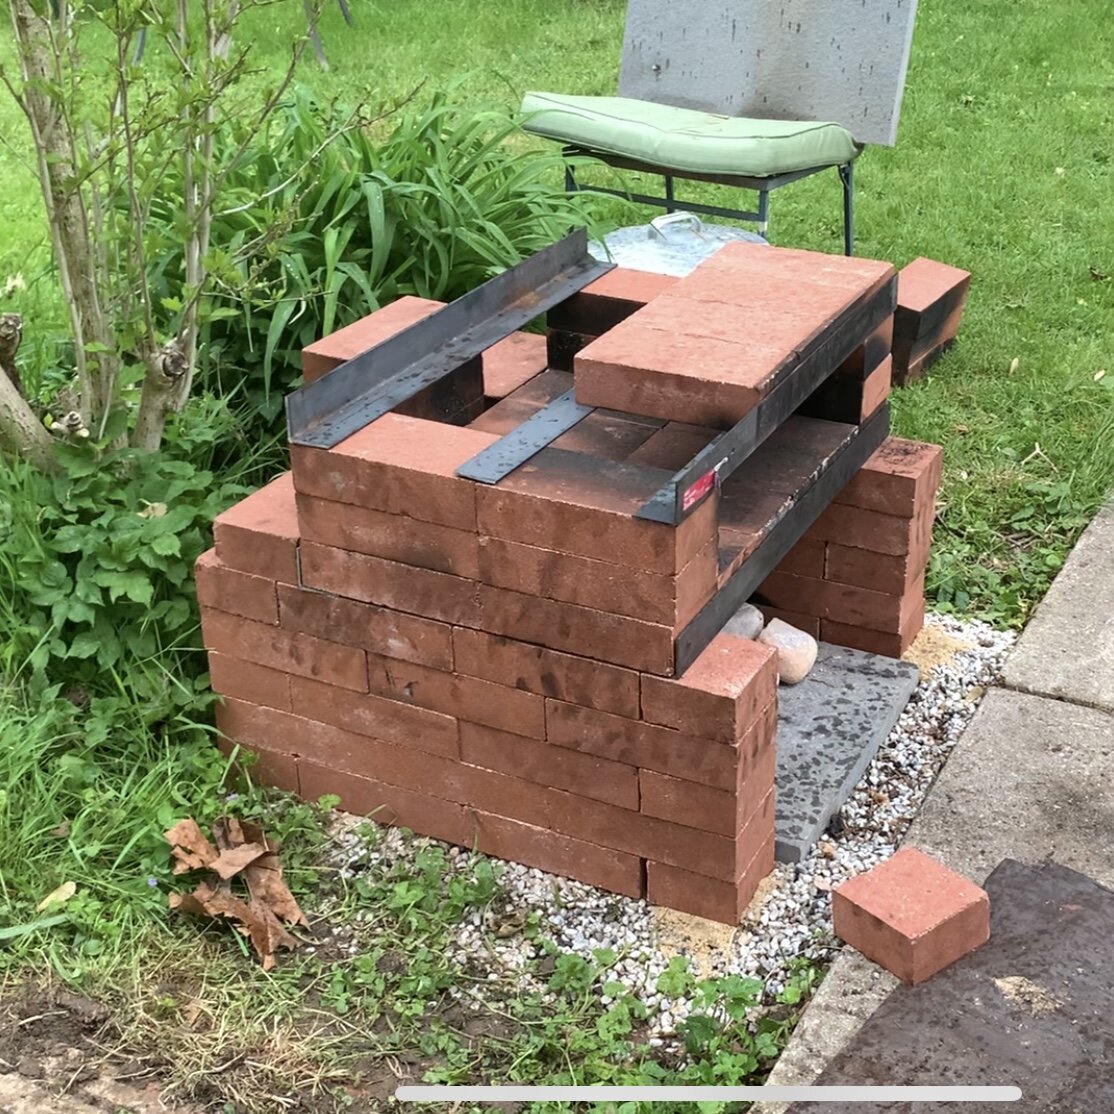
Rebuilding using firebrick and steel support.
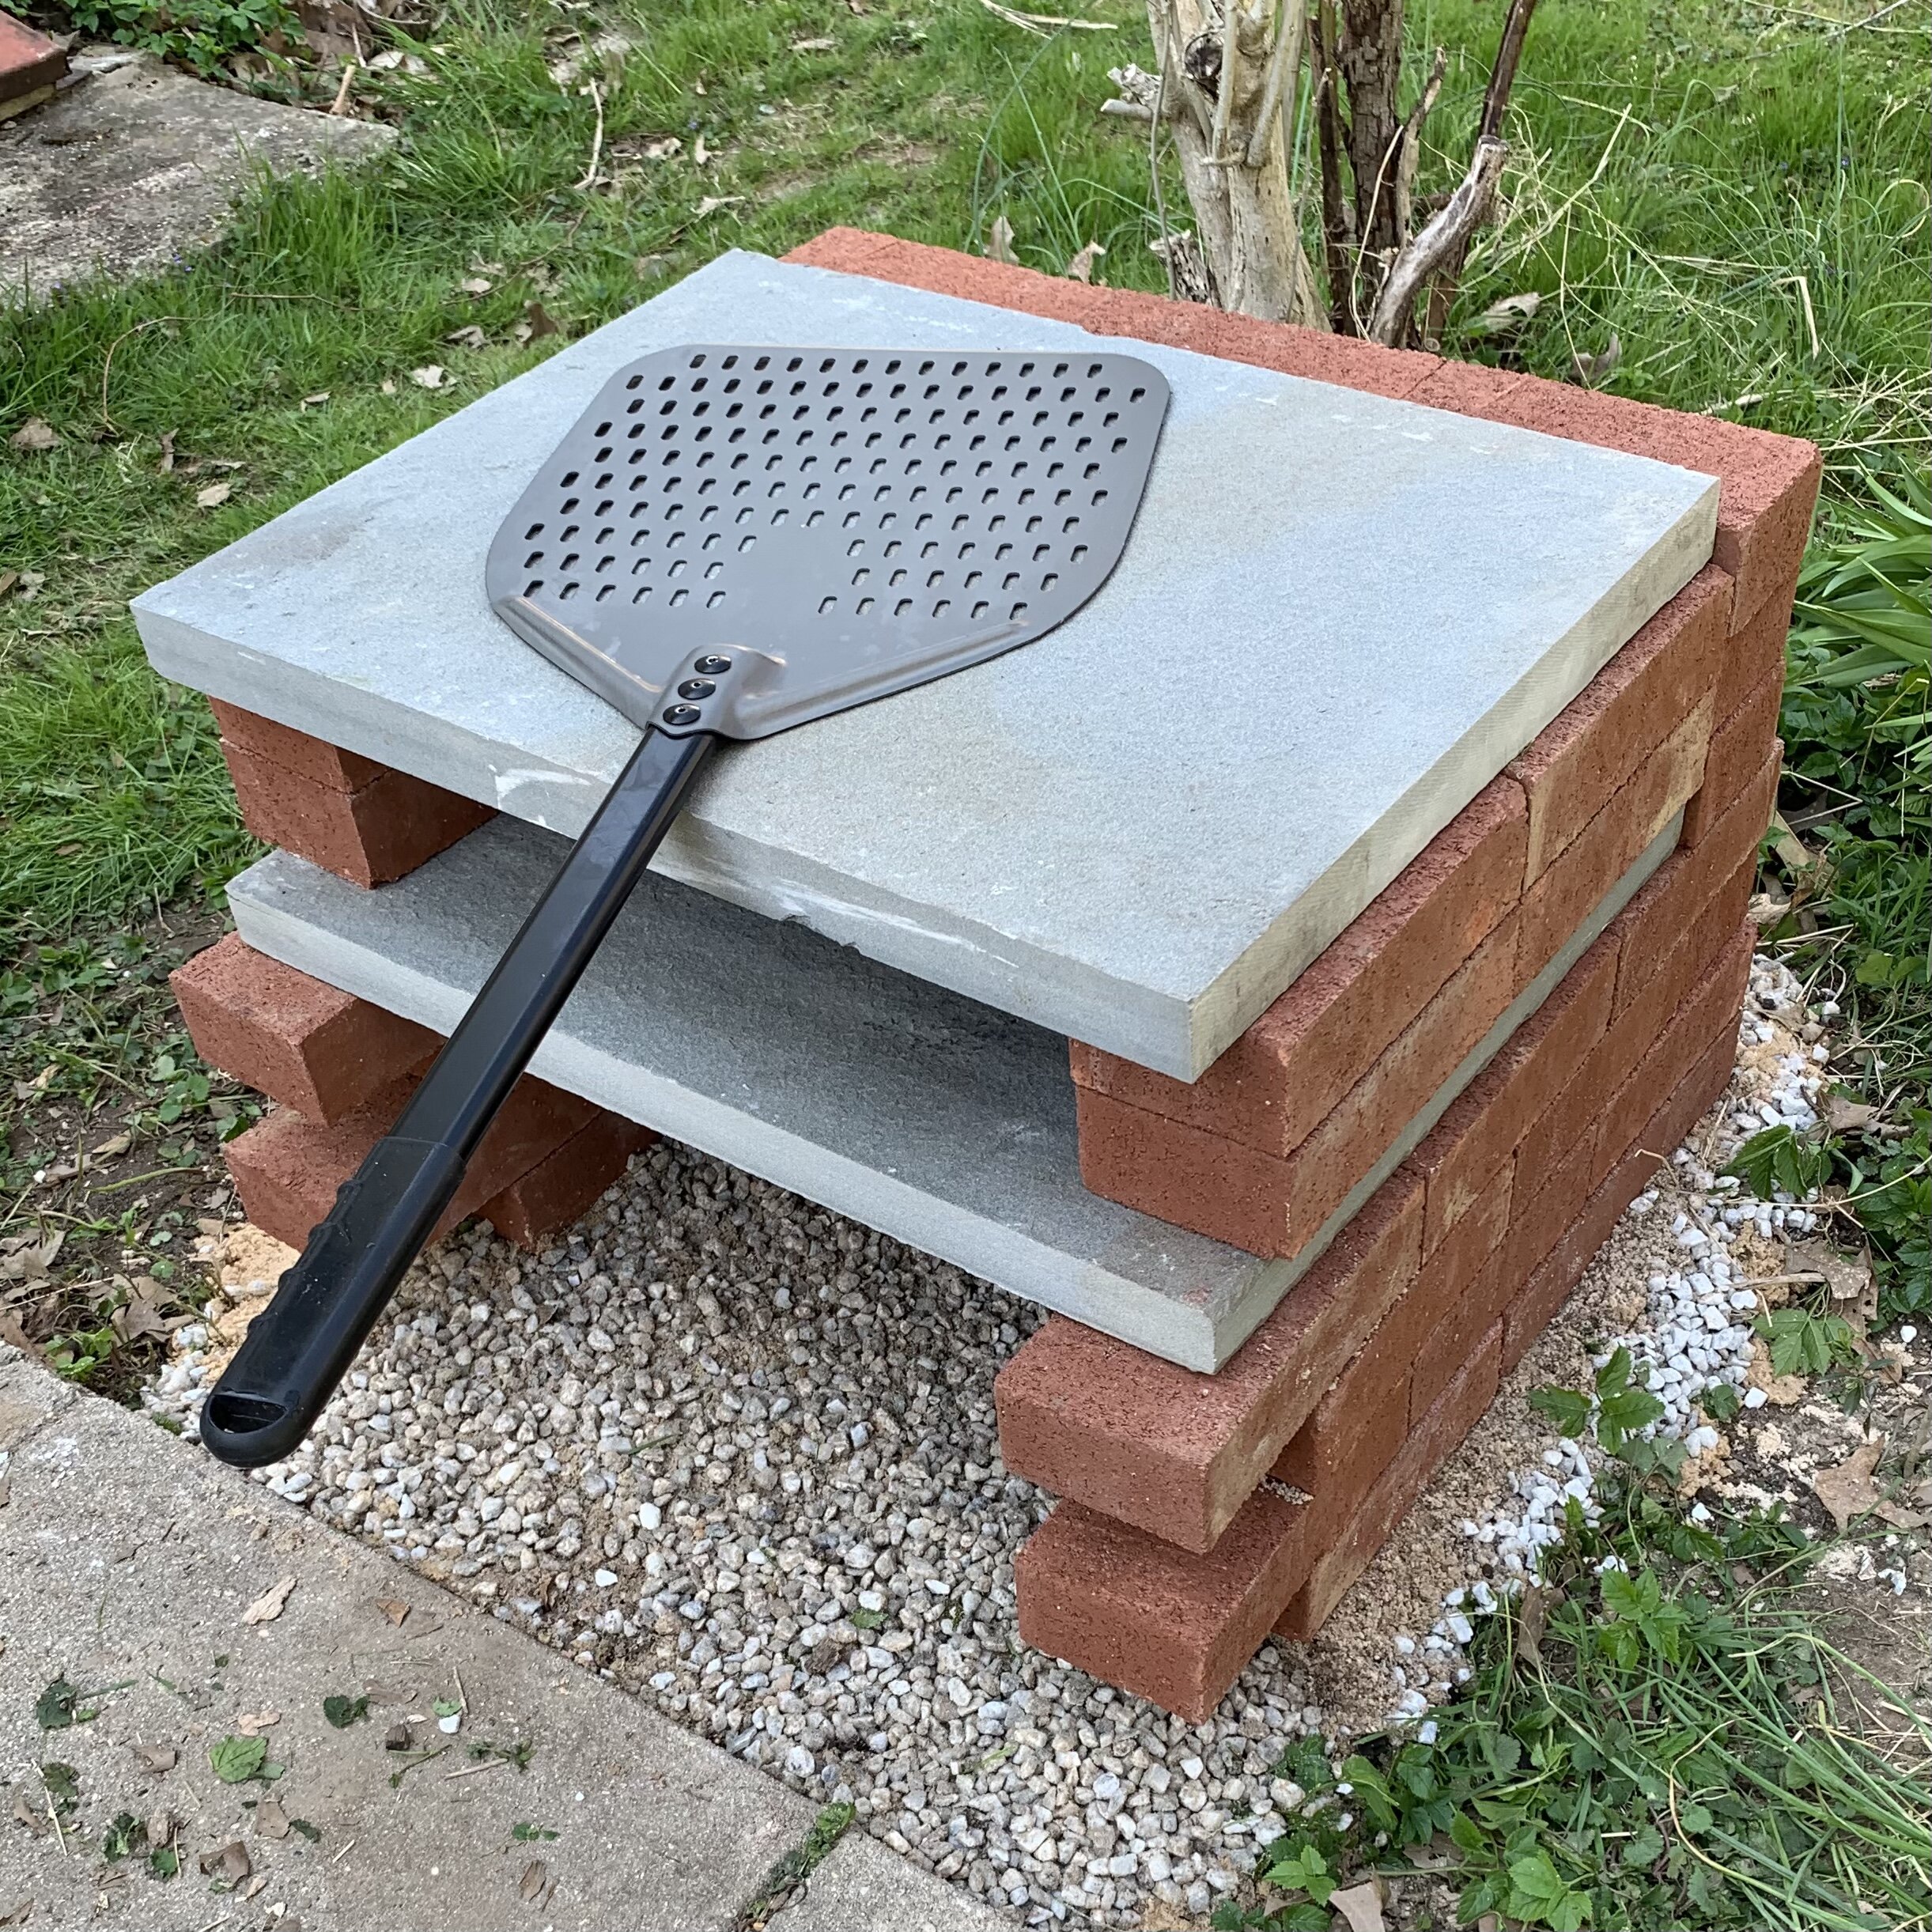
Once I rebuilt the oven using better bricks and more sound techniques, I put the second flagstone paver on top to have a nice surface to keep pizzas warm when they come out of the oven. Finally, rather than have alternating bricks half open like the original design, I used a mallet and brick chisel to split three bricks into six halves and place them like you see in the image above.
Fan My Fire
After several rounds of using the oven, which I’ve named Regina (meaning queen in Italian; Pizza Margherita was allegedly named after Queen Margherita of Savoy) I have figured out the best way to effectively get the oven at temps that can bake pizzas in minutes. Just know, the longer ahead you start the fire, the better. You can never start your fire too early, but you certainly can start too late.
Getting the fire started with small pieces of wood.
Several hours before you plan on using the oven, start with good wood and use a wood splitter to create smaller pieces that you can stack and light. I like to use a few bricks on the base for enhanced airflow beneath the fire. Once you have a small fire going, you can gradually add larger and larger pieces to build up the flame.
The goal at this stage is to build up as many coals as possible, which will in turn radiate heat throughout the entire oven. Once coals are developed, you simply maintain the fire by adding pieces of wood on top.
At this stage, I create a somewhat smaller coal enclosure using bricks and build a partial wall. This helps retain heat and also keeps the coals nicely contained.
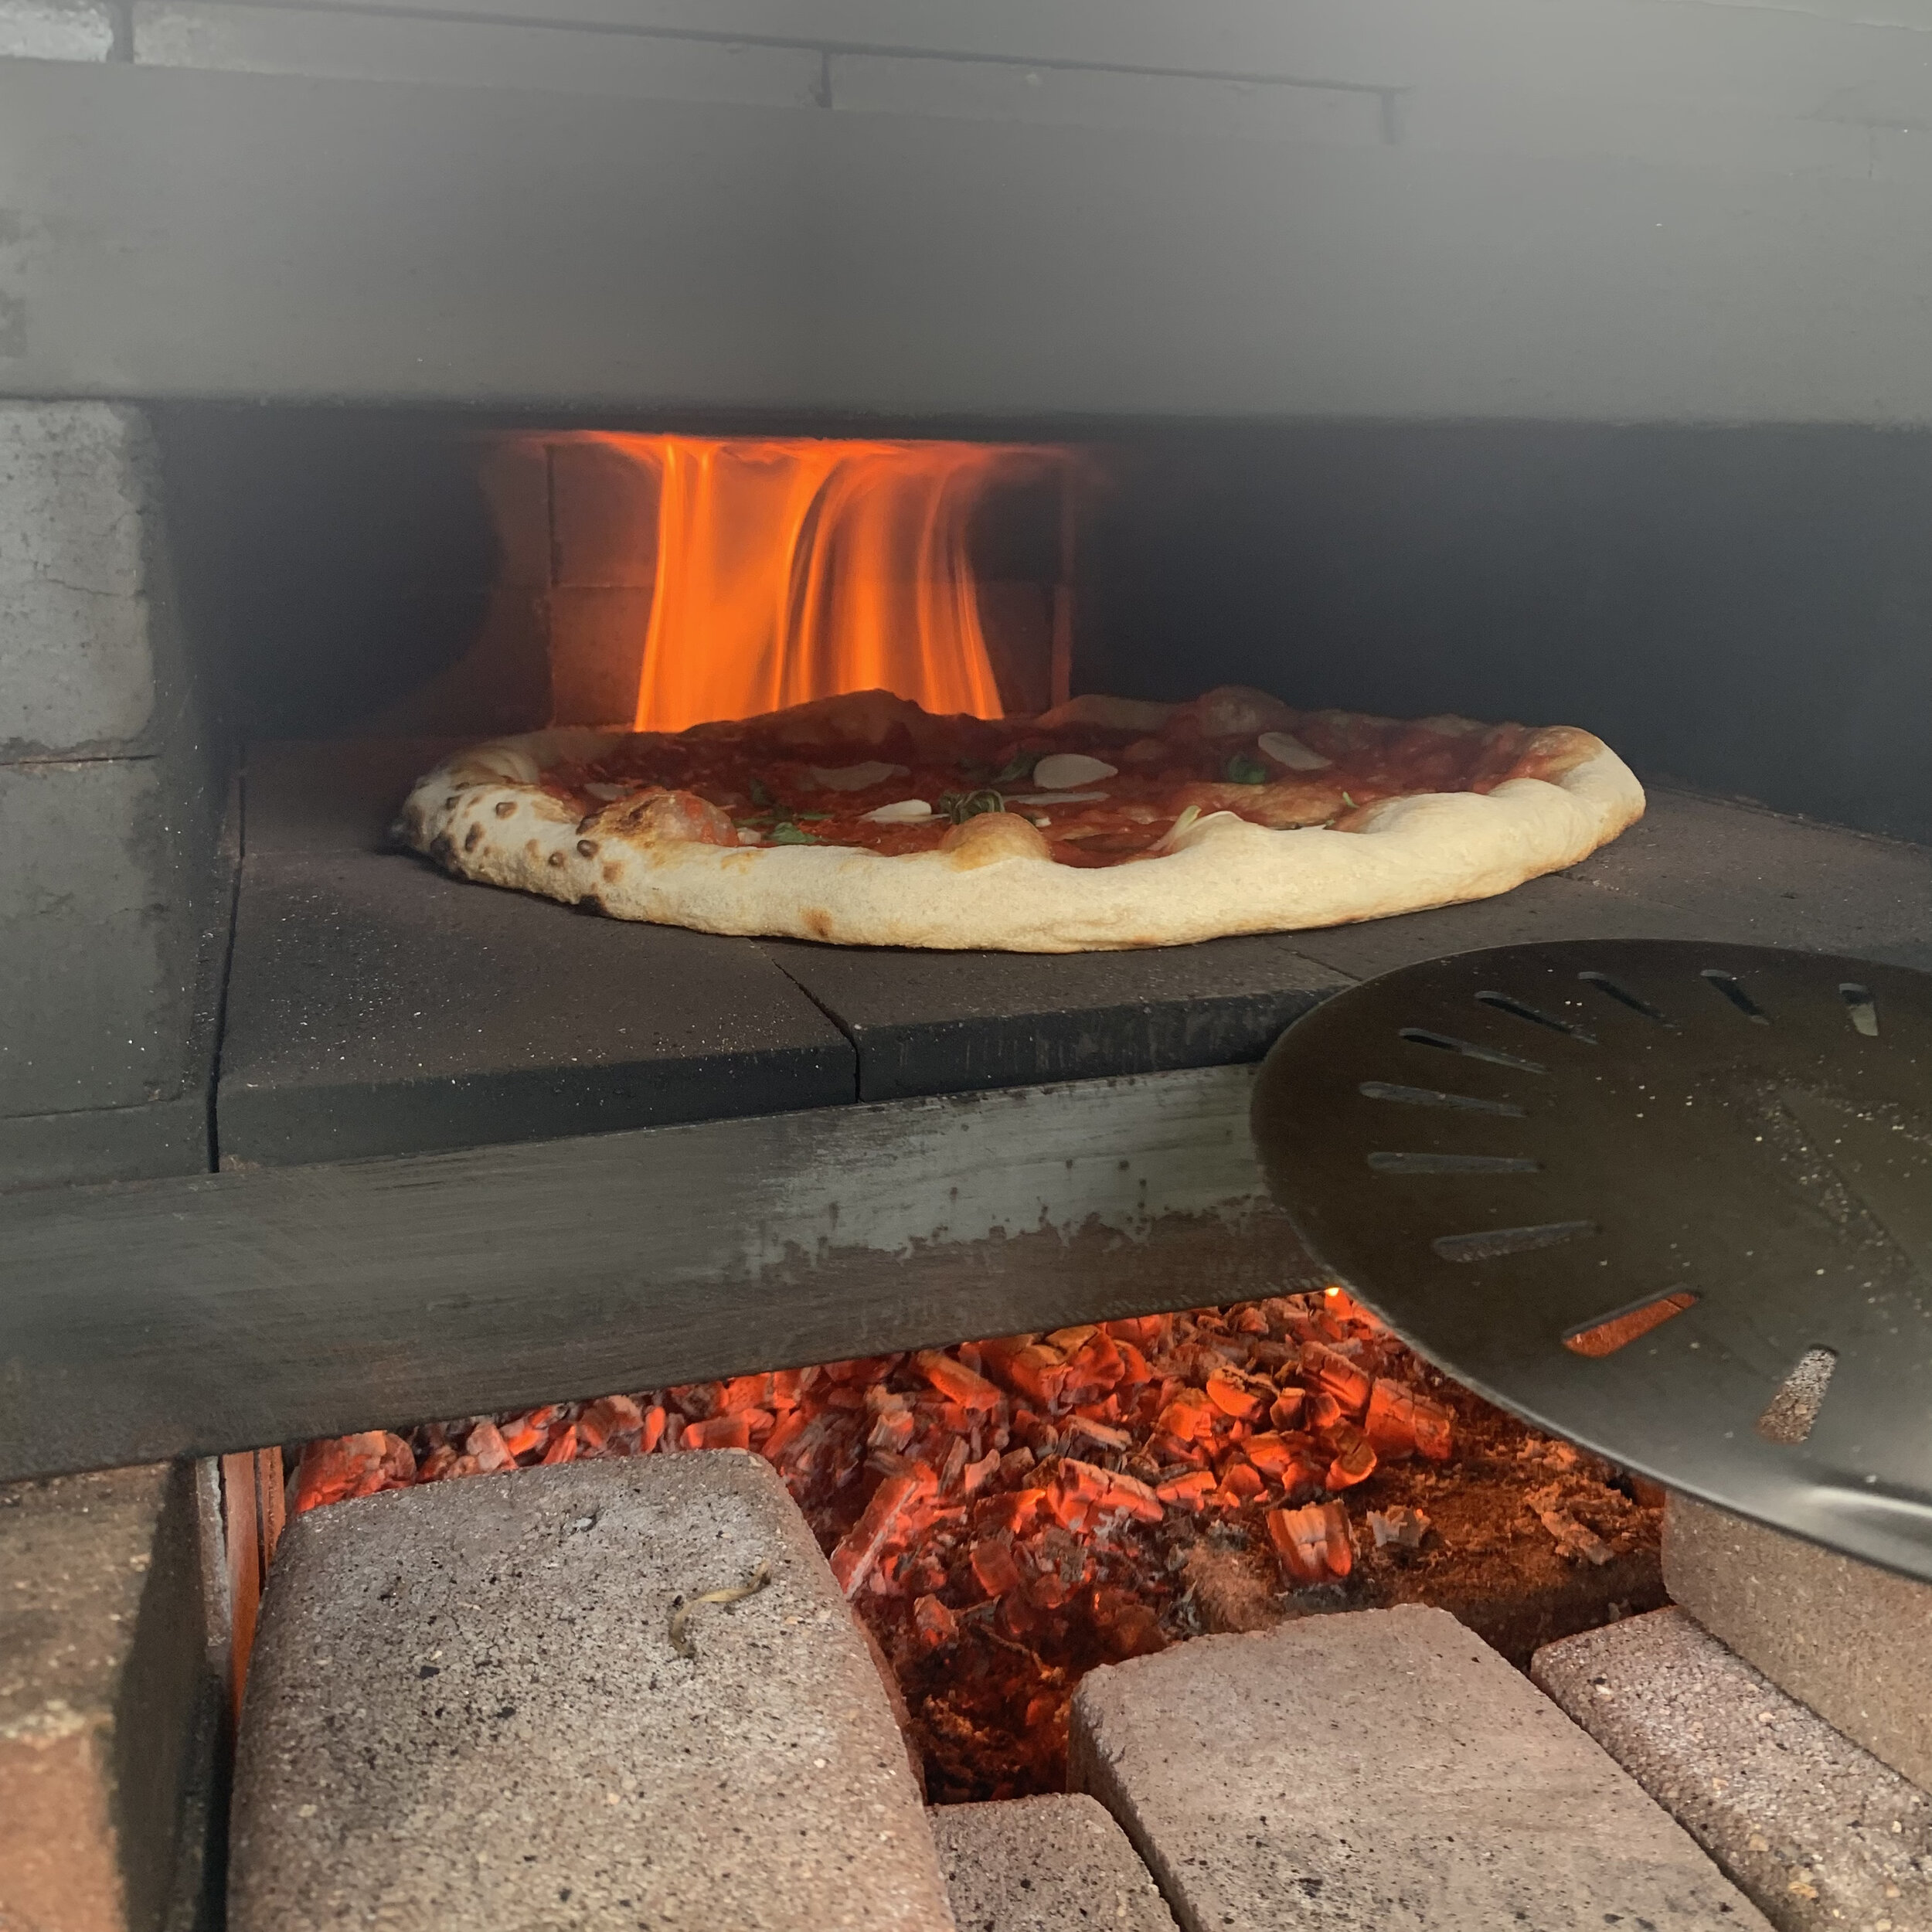
Hot coals below + flame above = perfect charring of the crust!
A few minutes before you want to fire a pizza, place a smaller split piece of wood on the coals and allow it to flame up the back vent. This will allow your toppings to bake nicely while the deck is a sustained temperature from the coals directly below.
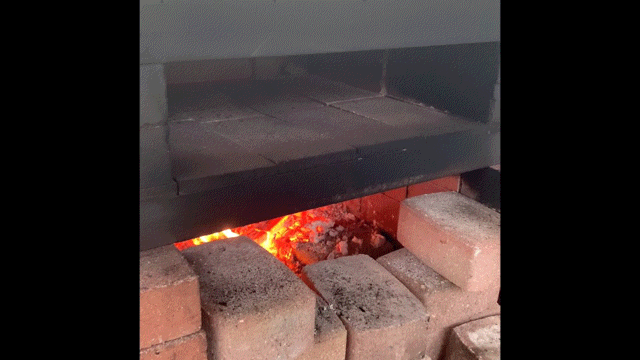
A GIF showing how to feed the fire before launch.
And that’s how it’s done! If you need a solid pizza dough recipe to go with your oven, I’ve also got you covered.
I’m happy to help anyone interested in this design make it a reality. My methods can save you the time and money I spent by allowing you to skip past my failures and creating something much more robust from the beginning.
If you’re interested and want more details, I’d love to hear from you, but If you can figure it out based on my info and resources I’ve shared here, best of luck!
-PizzaPtah